Going deeper with workflows
By the end of this guide, you will have a deeper understanding of how to use the Ikomia API to create complex image processing workflows.
Important
If you use a notebook (Jupyter, Jupyter Lab or Google Colab), please copy/paste this code snippet for a better display of images.
from PIL import ImageShow
ImageShow.register(ImageShow.IPythonViewer(), 0)
Step-by-step explanations
Code example :
from ikomia.dataprocess.workflow import Workflow
from ikomia.utils.displayIO import display
from ikomia.utils import ik

# Init the workflow
wf = Workflow()

# Add and connect algorithms
face = wf.add_task(ik.infer_face_detection_kornia(), auto_connect=True)
blur = wf.add_task(ik.ocv_blur(kSizeWidth="61", kSizeHeight="61"), auto_connect=True)

# Run on your image
wf.run_on(url="https://raw.githubusercontent.com/Ikomia-dev/notebooks/main/examples/img/img_people.jpg")

# Inspect results
display(face.get_image_with_graphics())
display(blur.get_output(0).get_image())
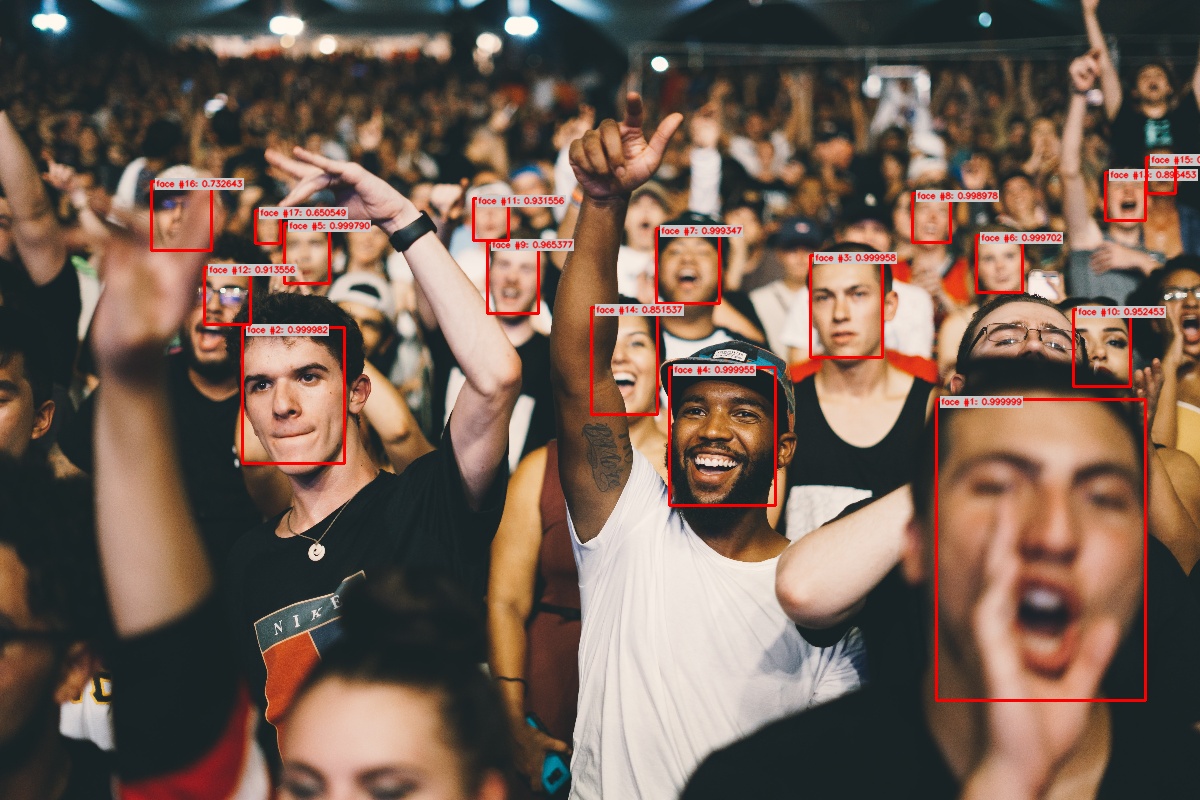
Kornia Face Detector |
Blurred faces |
|---|---|
|
|
This code showcases how to use the Ikomia API to create a simple image processing workflow : blurring face in images.
Let’s use this example as a starting point.
1. Import
from ikomia.dataprocess.workflow import Workflow
from ikomia.utils.displayIO import display
from ikomia.utils import ik
These lines import the required classes and functions from the Ikomia API.
Workflow is the base class to create a workflow object.
display() is a useful tool to display images based on the PIL library.
ik is an auto-completion system designed to facilitate algorithm search and settings (see here for more information)
2. Create Workflow
wf = Workflow()
This line creates a new Workflow object, which will be used to manage the tasks in the workflow.
3. Add and connect algorithm
There are 2 ways to add algorithms to your workflow thanks to the add_task() function.
Add by name
The first one is to simply use the name of the algorithm you want to test:
face = wf.add_task(name="infer_face_detection_kornia", auto_connect=True)
Add by auto-completion
When you don’t know exactly the name, you can use the ik namespace to search algorithms:
face = wf.add_task(ik.infer_face_detection_kornia(), auto_connect=True)
The auto_connect=True parameter means that the output of the previous task (if any) will be automatically connected to the input of this task.
Connect manually
In some cases, you might want to connect manually your algorithms. In that case, you can do the following:
face = wf.add_task(ik.infer_face_detection_kornia())
wf.connect_tasks(wf.root(), face)

blur = wf.add_task(ik.ocv_blur(kSizeWidth="61", kSizeHeight="61"))
wf.connect_tasks(face, blur, [(0,0), (1,1)])
The root() function is the root node of any workflow and contains input data (images, videos etc…).
The connect_tasks() function automatically establishes a connection between two tasks, if the indexes are not specified.
If the indices are provided, the function connects the output index of the source task with the input index of the target task
4. Algorithm parameters tuning
By auto-completion
blur = wf.add_task(ik.ocv_blur(kSizeWidth="61", kSizeHeight="61"), auto_connect=True)
This line adds a blur effect task to the workflow using OpenCV’s blur function.
The kSizeWidth and kSizeHeight parameters define the size of the kernel used for blurring.
By a Dict approach
Another way to set parameters is to use the task object directly and the ik auto-completion system for parameters name retrieval:
blur.set_parameters({
    ik.ocv_blur.kSizeWidth: "61",
    ik.ocv_blur.kSizeHeight: "61"
})
5. Apply your workflow on your image
There are 3 ways to apply workflows on images with the run_on() function.
From image path
Use the path to your image, then Ikomia loads and runs the workflow on this image:
wf.run_on(path="path/to/your/image.png")
From image buffer
Most of the time, you work with image objects (numpy or OpenCV), in this case you can do the following:
import cv2
img = cv2.imread("/path/to/your/image.png")

wf.run_on(img)
From image URL
When using images from the web, you can directly use their URLs:
wf.run_on(url="https://www.url-image.com")
From folder (batch processing)
In some cases, you may want to apply the same workflow on multiple images (batch processing).
To do so with Ikomia, just place your images in a folder and run on that folder :
wf.run_on(folder="/path/to/your/folder")
5. Managing outputs
Ikomia provides a lot of different outputs depending on the algorithm category (object detection, object segmentation, pose estimation).
To get a detailed overview, please read this chapter.
When you want to visually inspect your results but you are not sure of the available outputs, just use a print on a task object:
print(face.get_outputs())
It will show the task outputs information in your console:
[CImageIO(IODataType.IMAGE, CImageIO), CObjectDetectionIO()]
Accessing the output results of a task always follows the same pattern:
face.get_output(n)where n is the nth output of the task (starting at 0)
Single image
If the output is of type CImageIO, you can get a numpy image with :
face.get_output(n).get_image(): get numpy array image
Single image with graphics (bounding boxes)
face.get_image_with_graphics(): get numpy image with burned graphics such as bounding boxes, text, points or polygons on your input image.
Results as objects
face.get_results()which returns an object containing all resultsface.get_results().get_objects()which returns a list of all objects
Results as JSON
face.get_results().to_json()which returns your results in JSON format
6. Display your results
Ikomia provides a useful tool to easily display your image results.
Based on the PIL image library, you can now inspect your results in one line of code.
display(face.get_image_with_graphics())

display(blur.get_output(0).get_image())
